Setting role privileges

Role privileges are integral components of the Role-Based Access Control (RBAC) system in Cloudera Data Visualization. They define the level of dataset access that a role is allowed to grant to the members of a specified role.

To add new role privileges to a role, follow the steps outlined below.

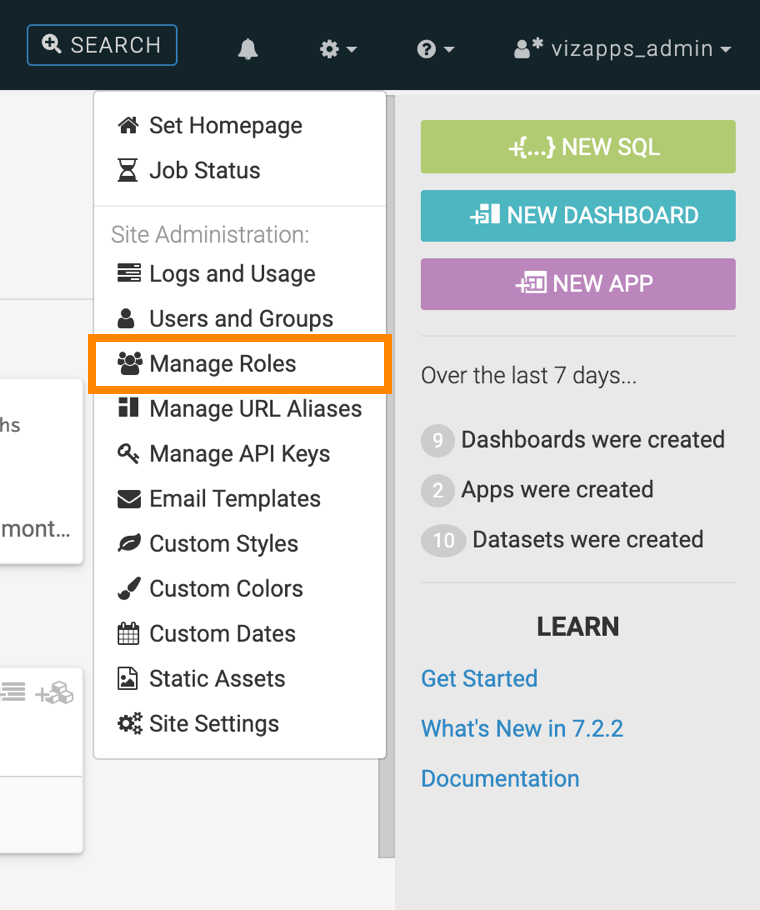
  1. On the main navigation bar, click the (gear) icon.
  2. In the drop-down menu, click Manage Roles.
  3. In the Manage Roles interface, find the role you wish to edit and click the (edit) icon next to the respective role.

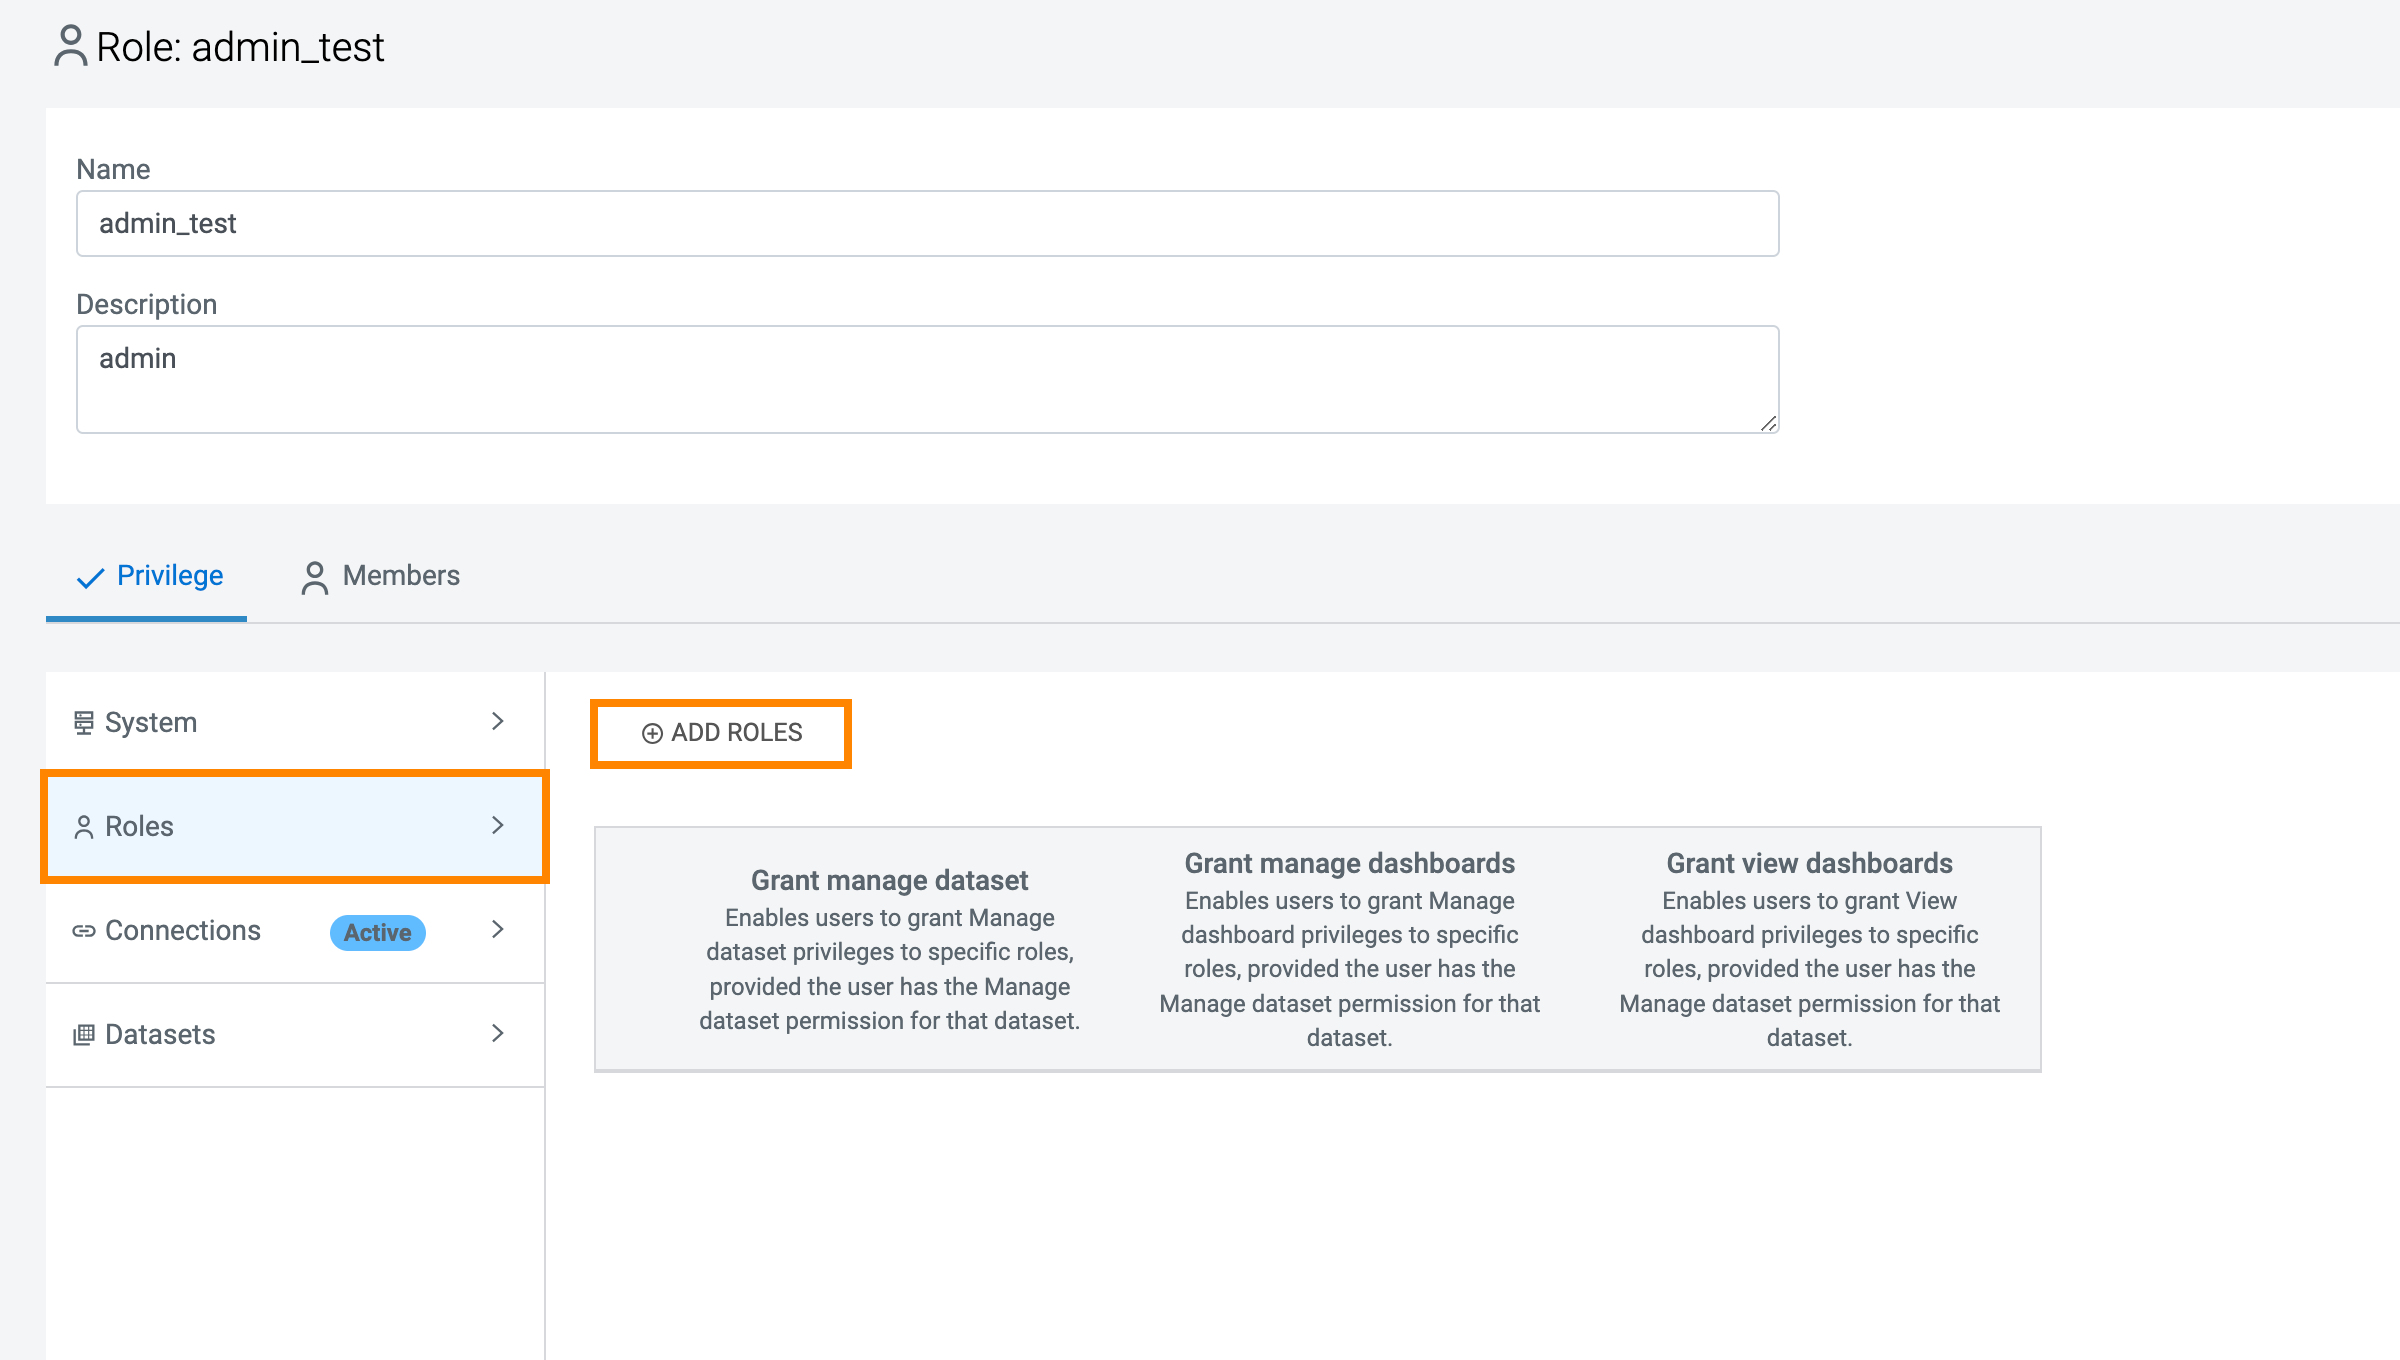
    The Role Detail interface is displayed.

  4. Switch to the Roles category on the Privilege tab.
  5. Add a new role by clicking ADD ROLES.

    The Add Role Privilege modal window appears.

  6. Select the required role from the Roles drop-down list and add it.

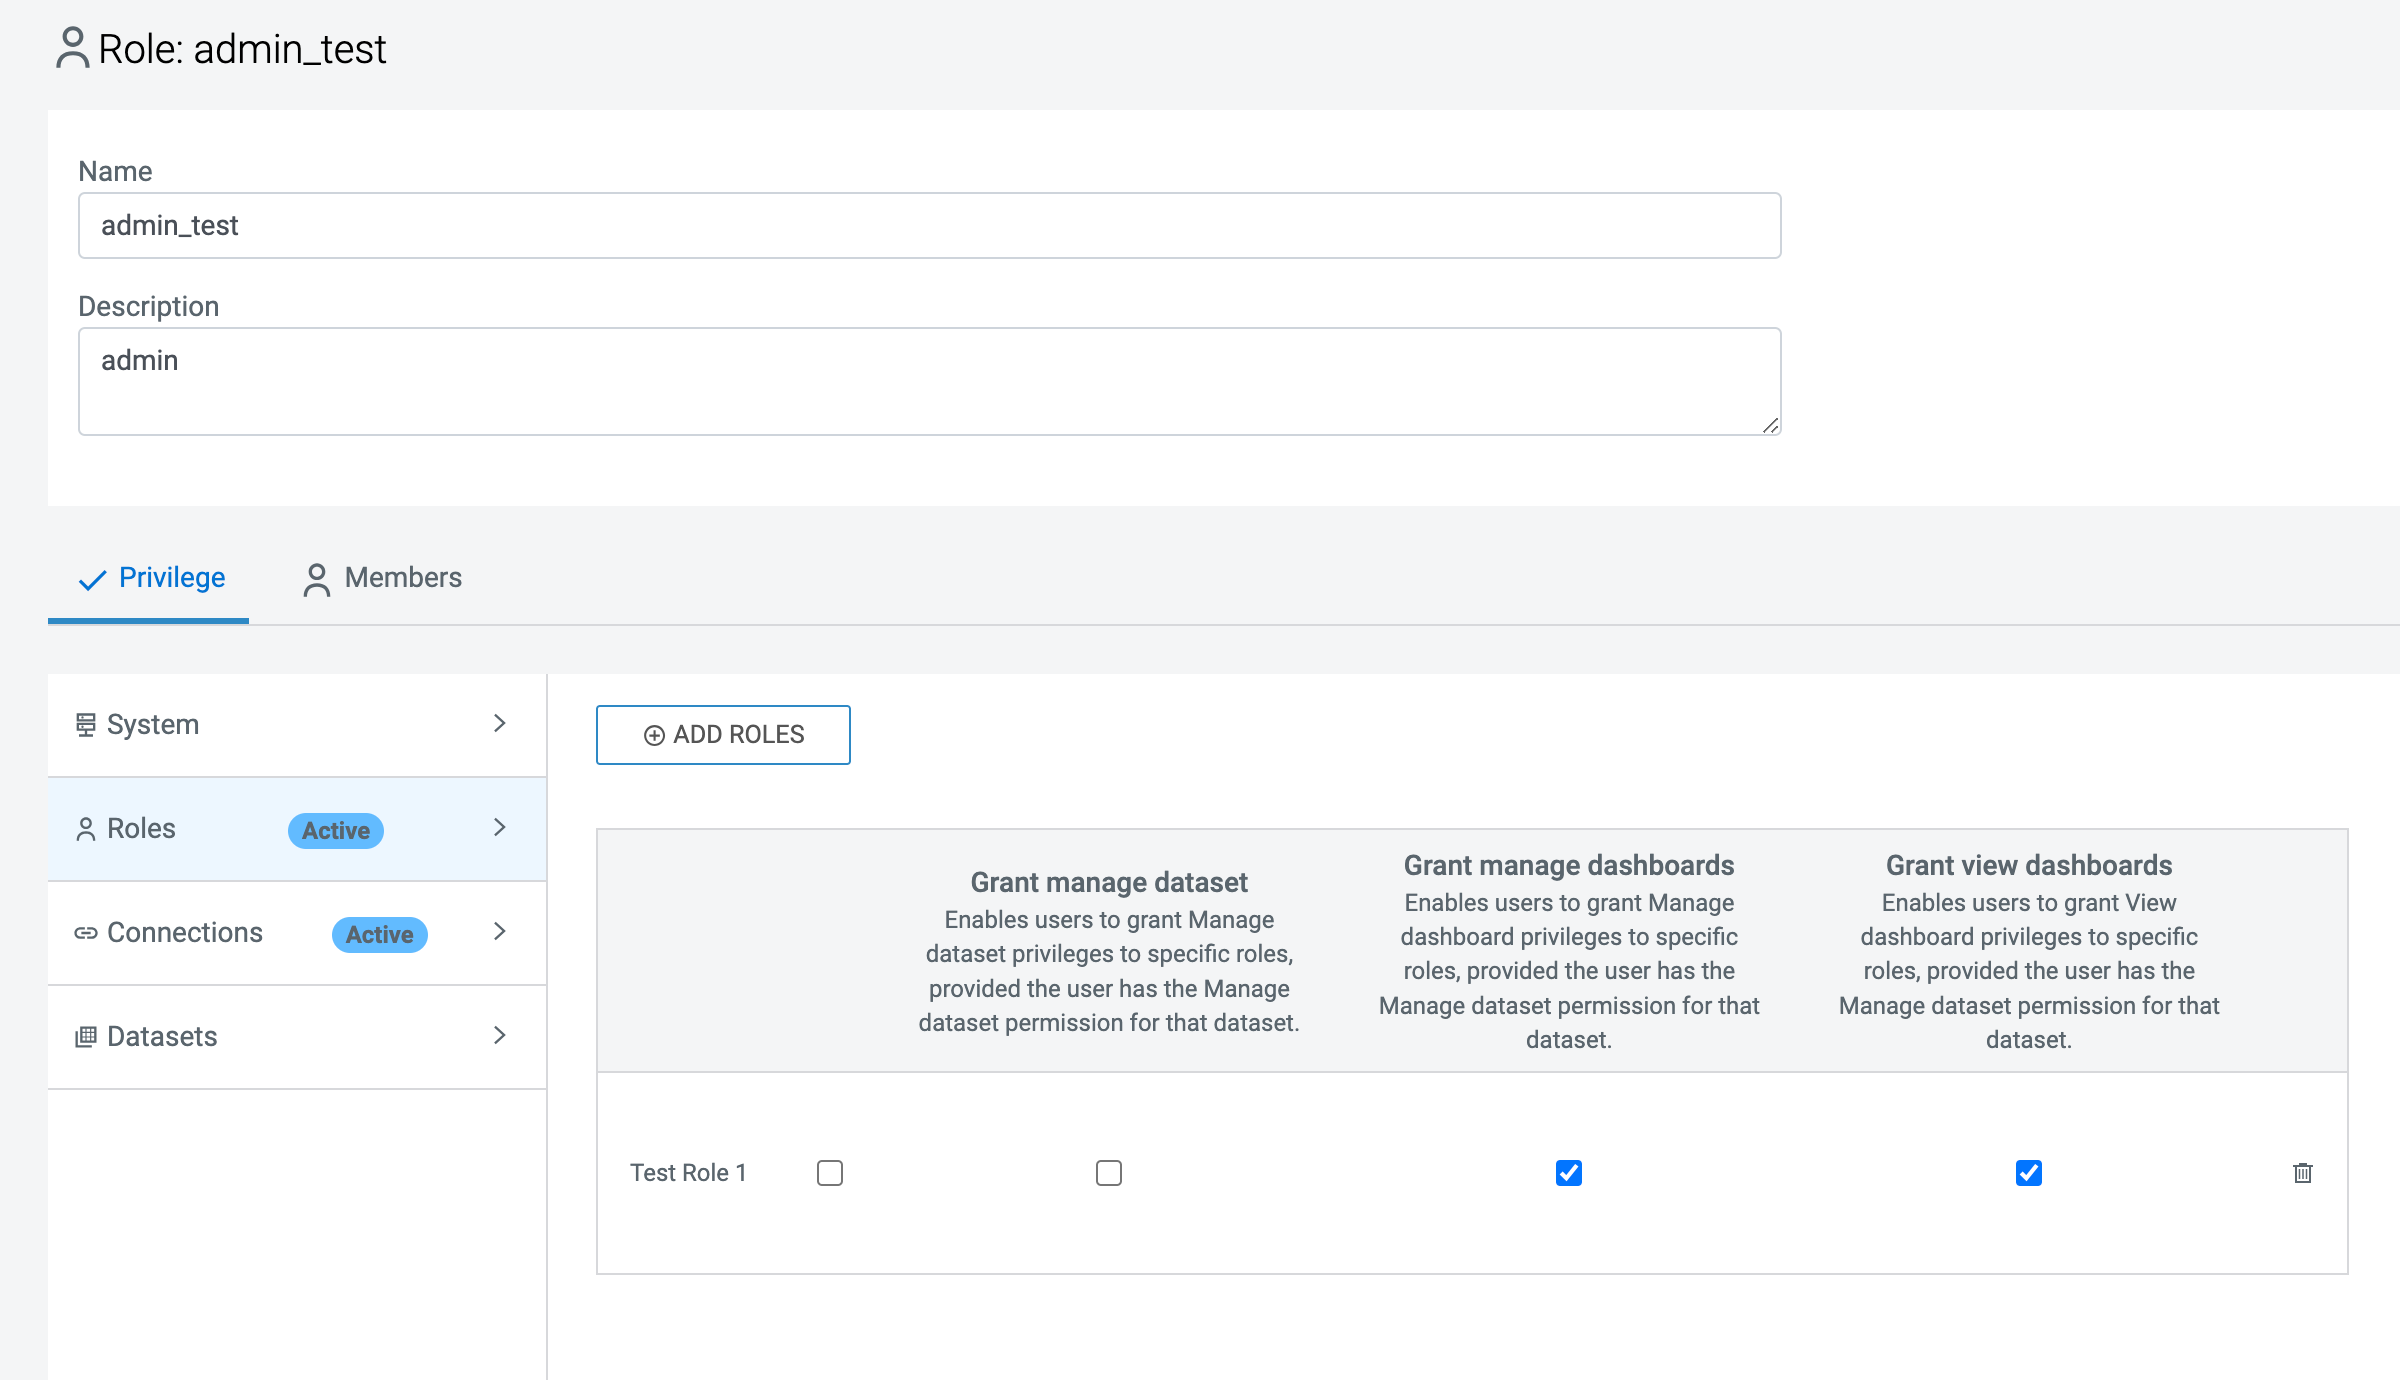
    When the role is added, by default, all possible privileges are marked for it.

    You can repeat this step to add more roles to the list, if needed.

    You can remove a role from the list by clicking the Delete icon.

  7. Select the checkboxes for the actions that you want to permit for the role(s) you have added.
    • Grant manage dataset
    • Grant manage dashboards
    • Grant view dashboards
  8. After adding roles and selecting the appropriate role privileges, click APPLY CHANGES.
  • The members assigned to the selected role can now grant dataset access based on the role-based privilege rows.
  • The selections in the rows indicate the level of privileges each role receives. For example, Test Role 1 can grant Manage and View privileges to users.
  • The dataset access permissions are granted to the roles defined on the component line.
Proceed to Setting connection privileges.

For more information on possible permissions, see RBAC permissions.