Setting filter associations
The final task in restricting user or user group access is to specify filter associations.
Make sure that either of the listed requirements is fulfilled:
- You have Manage roles and users permission.
- You have View roles and users permission and MANAGE_DS_FA = True has been added to the Advanced Site Settings.
-
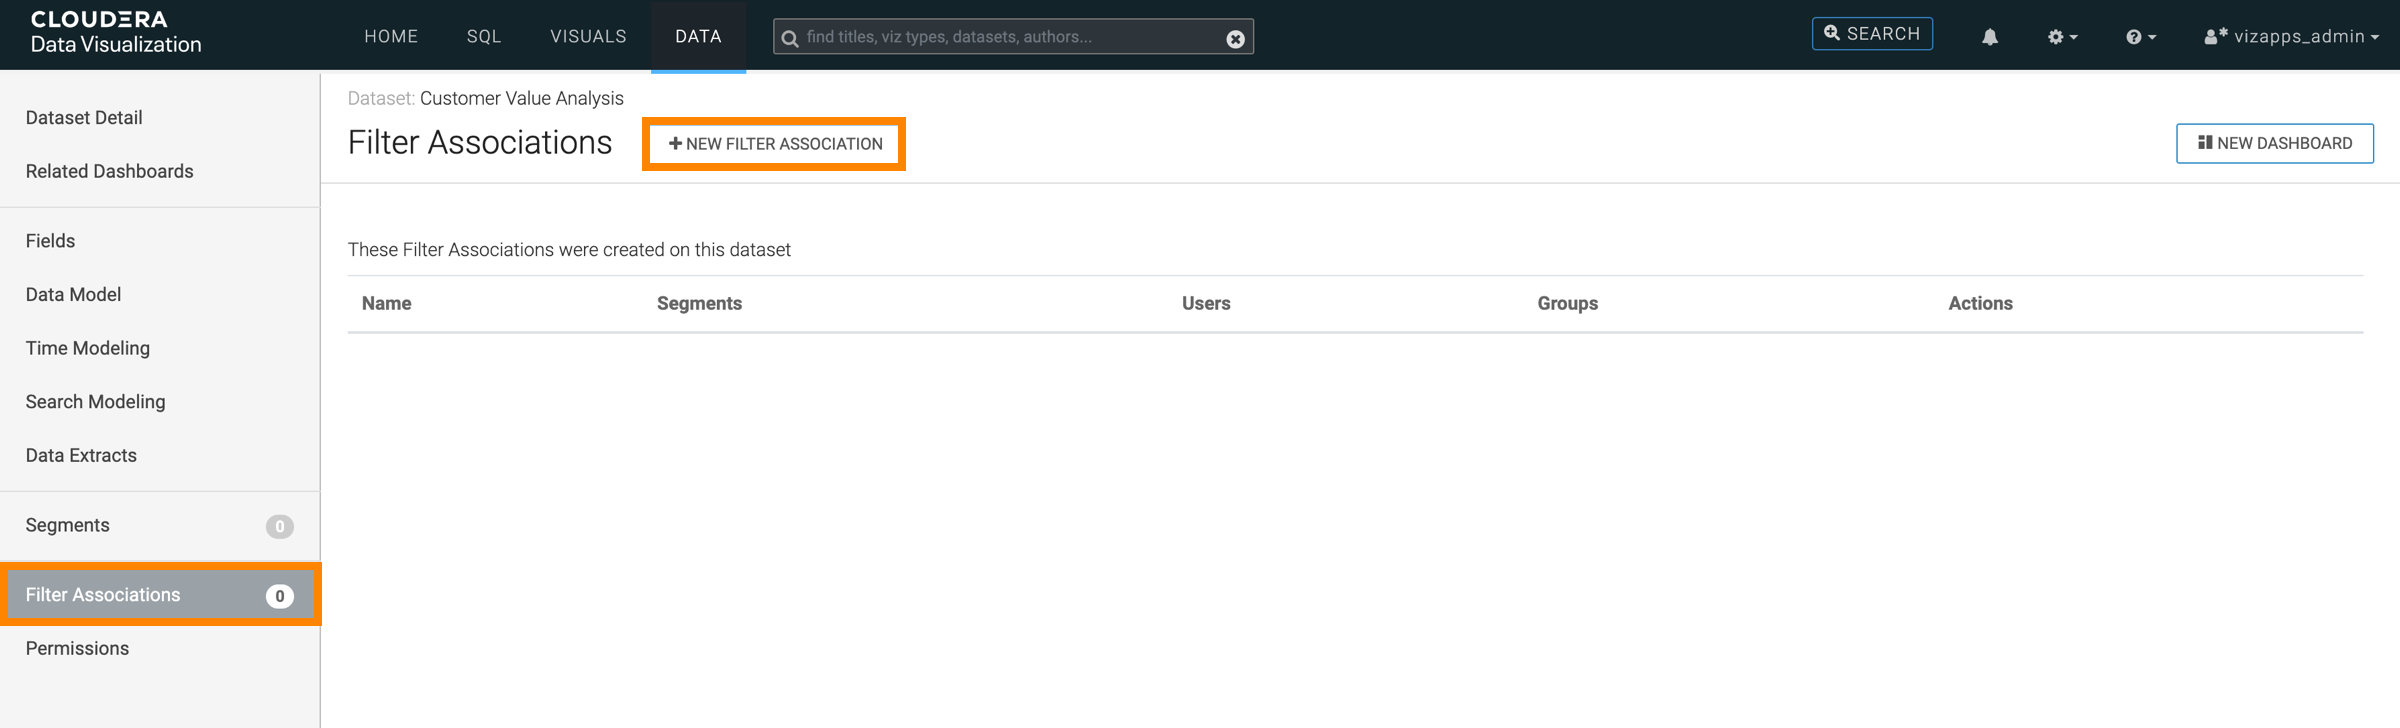
In the left navigation, select Filter Associations and click
NEW FILTER ASSOCIATION.
-
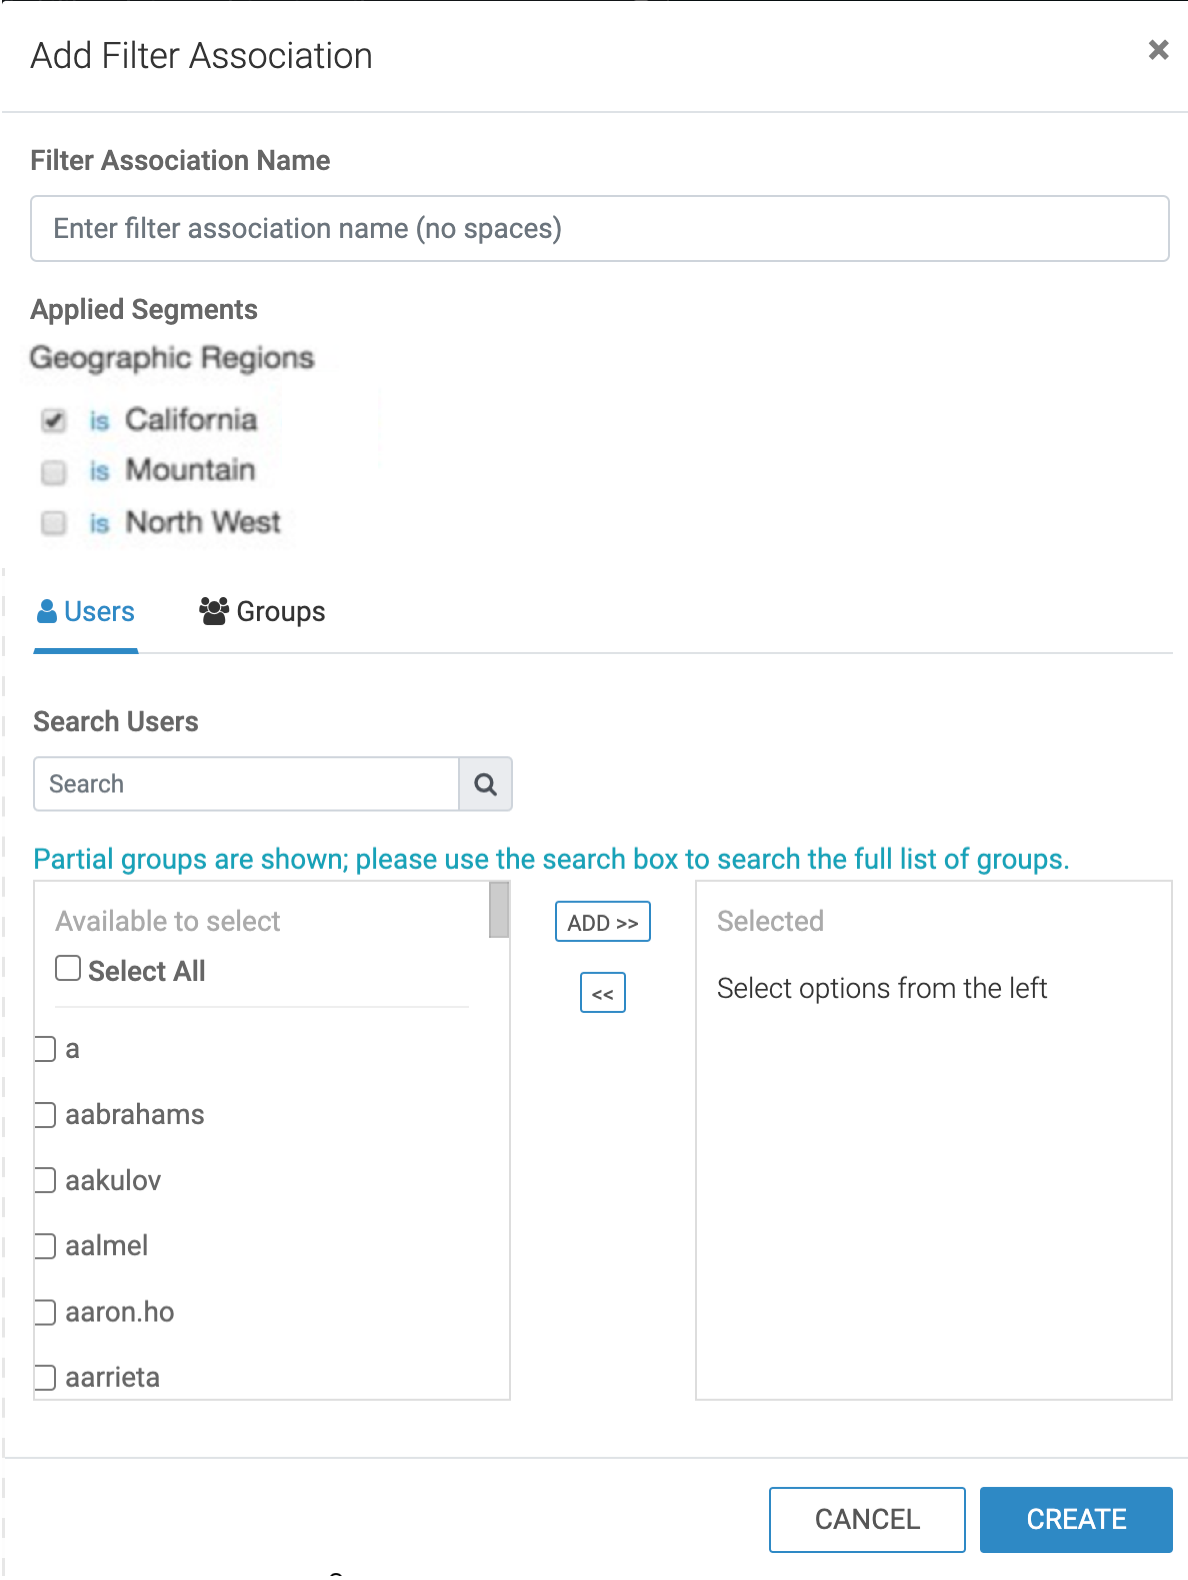
In the Add Filter Association modal window, perform the
following actions:
- Under Filter Association Name, enter CA SalesReps.
- Under Applied Segments, select is California from Geographic Regions.
- On the Users tab, select users CArep1 and CArep2, and add them to the filter association.
- Click CREATE.
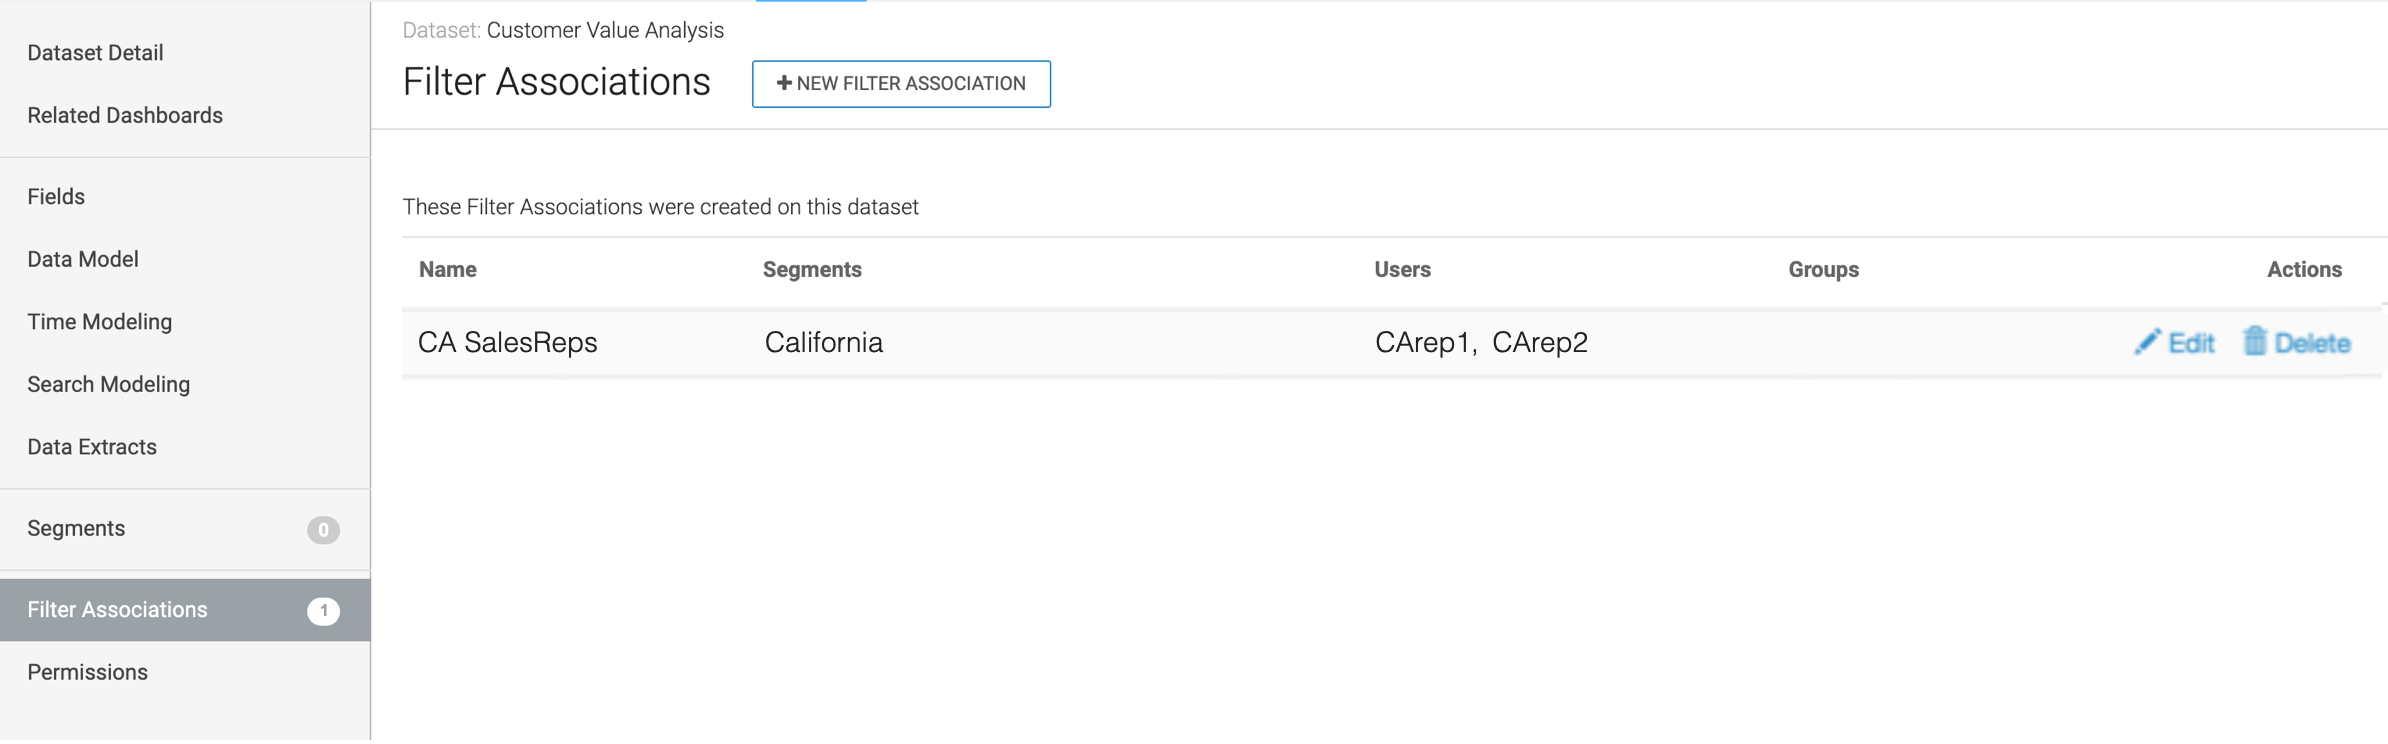
The new filter association now appears on the Filter Associations interface.
-
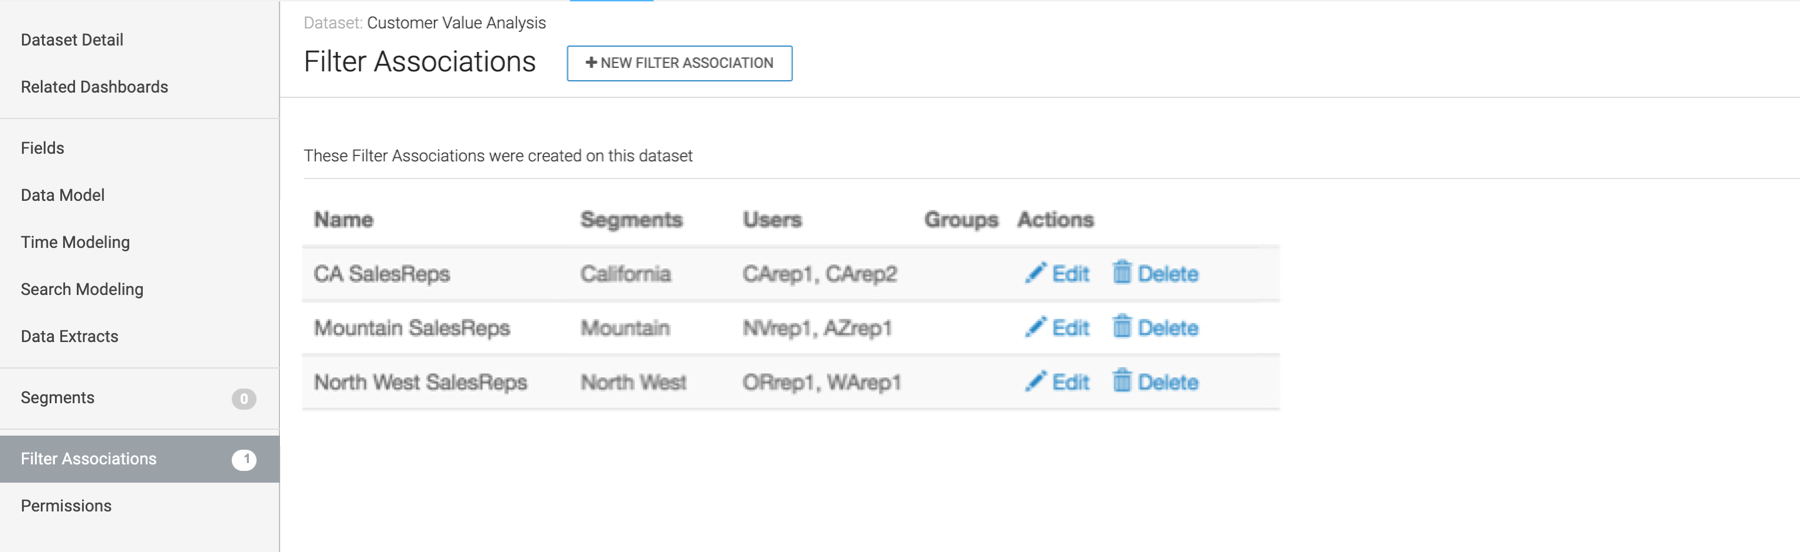
Repeat the steps above to add two more filter associations as described in the
following table:
Table 1. Definitions of Segments on the Dataset Customer Value Analysis Filter Association Name Applied Segment Users to Include Mountain SalesReps Mountain NVrep1, AZrep1 North West SalesReps North West ORrep1, WArep1 After you define these filter associations in your dataset, your Filter Associations interface should look like this: